Adding User Components to a Game Object
You can add a user component to an object (entity) in two ways: manually, and with the Scene Editor.
Adding a component to an object manually:
const platform = ...;
const move = new HorizontalMove(platform);
move.minX = 100;
move.maxX = 400;
The constructor of the user component HorizontalMove adds the component to the object. You can keep a reference to the component or get the component from the game object, with the getComponent method:
const move = HorizontalMove.getComponent(platform);
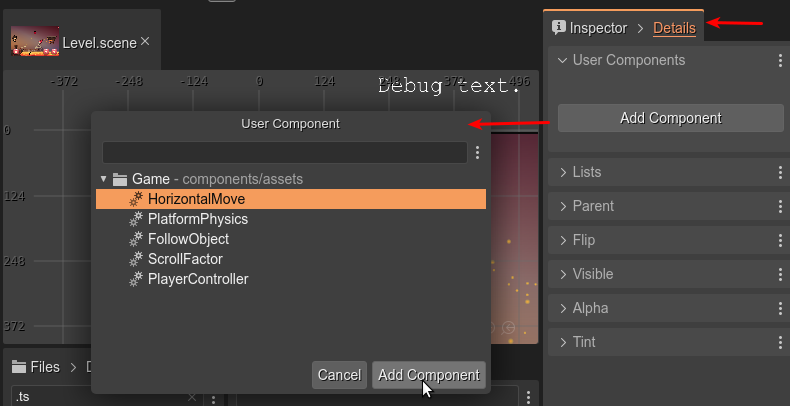
However, the interesting is adding components to objects in the Scene Editor.
This is possible in the User Components section. It shows the Add Component button.
When you click that button, it shows a dialog with all the components defined in the project (grouped by the *.components files). Select the one you want to add:
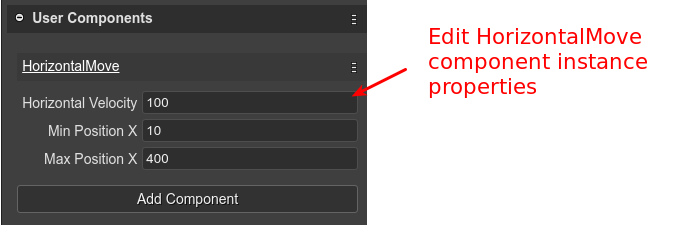
Then, the properties of the components are shown in the same User Components section, and are ready to be set with new values:
The user components compiler will generate the code to create the component, just like if you write it by hand:
// bridge2 (components)
const bridge2HorizontalMove = new HorizontalMove(bridge2);
bridge2HorizontalMove.horizVelocity = 100;
bridge2HorizontalMove.minX = 10;
bridge2HorizontalMove.maxX = 400;
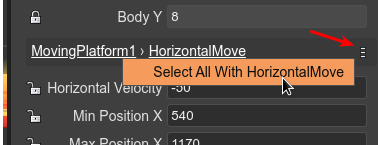
If the selected object is a prefab instance, then the components present in the prefab are shown too, and you can lock/unlock its properties:
Look at the prefab and the user component names: both are shown as links. If you click on it, it will open the prefab or the user component in its editor. Also, each user component panel has a menu icon. Click on it to list other options, like select in the scene all the objects with the same user component: